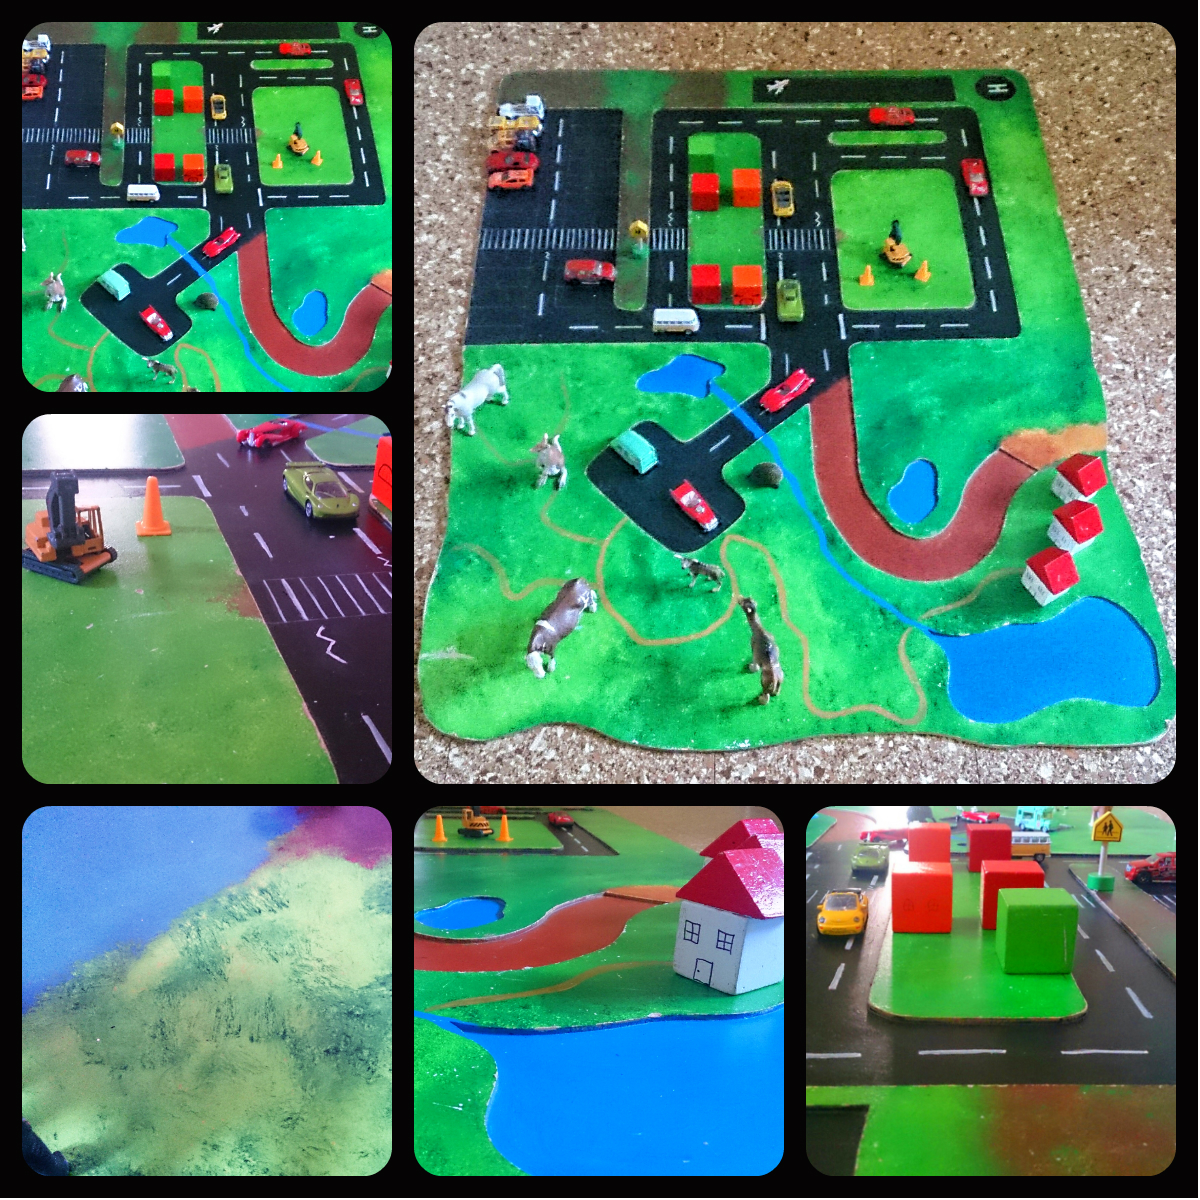
After scouring the shops for a whizz-bang road scene that our boys could happily race their cars on, we decided that those on offer were either too unimaginative, too pricey or made of some horrid material that wouldn’t stand the wear and tear of two vroooooming boys and their scratchy cars.
So, armed with one large piece of white-backed MDF (1200mm x 1200mm) and one piece of unpainted MDF of the same size (both sourced from sustainably managed plantation forests – Bunnings have them for about $11), we set to work pencilling in the various requirements we thought our boys would need for ample road rampages.
Four easy steps to vroom, vroom, vrooming:
Note – If you don’t have access to a jigsaw cutter, just buy one piece of white-backed MDF and paint directly onto the raw side.
1. Draw your preferred road pattern onto the unpainted MDF piece. Use a light pencil and rubber and don’t fuss too much.
2. Cut out the lakes, road and car park using a jigsaw. Glue the remaining frame onto the raw side of the white-backed MDF (the pre-painted white side lies smoothly on the floor).
3. Painting time! We used bright acrylic paints and I have to say the best move we made was grabbing a few old sponges to do most of the work. Not only do they make painting a thousand times easier, you also get a wonderful texture to your scene making you look outrageously artistically gifted. If you’re getting your munchkins involved, hand them a sponge each – they can’t go wrong. Once you have laid the foundations of your painting (such as a black road, green meadows, blue lakes and a brown country lane), let it dry before filling in the finer details. This can be done using both finer paint brushes or permanent markers. I definitely advise using a ruler to mark out your car park and lane lines – I used a thin silver pen for the car park lines and a thick white marker to denote the lanes.
4. Varnish! There is no need to sand your MDF – in fact, doing so will destroy your beautiful scene. Simply lacquer with a clear varnish once or twice, and you are ready to race!
The road pictured here is now three years old, it has stood the test of countless collisions, an endless series of incredibly involved roadworks and hundreds of zoological expeditions. Lastly, it’s super easy to store behind a cupboard or under the bed :-).
The cost & production time for this project:
Cost of plain MDF, 1200mm x 1200mm x 3mm: $7
Cost of white-backed MDF 1200mm x 1200mm x 3mm: $11
Cost of paints: $5 (based on how much of my paint stash we used)
Wood Glue: $5 for a bottle, you’ll only use a bit.
Total cost of project: $23 tops. Less of course if you choose a smaller piece or just buy the one piece.
